Friday, June 10, 2011

Molasses Jumbles


The Cooky Book says this recipe is from the days of WWII, when butter and sugar were rationed. This recipe gets most of its sweetness from molasses, which is actually the ingredient used in the greatest quantity after flour. While the picture accompanying the recipe shows this cookie is no beauty queen, these cookies do pretty well for being so low in shortening and sugar.
Betty's Molasses Jumbles...not as pretty as mine were!
------------------------------------------------------------------------
Molasses Jumbles
¼ cup plus 1 Tbsp shortening
½ cup brown sugar, packed
1 cup molasses
3 ½ cups flour
1 Tbsp soda
½ tsp salt
½ cup cold water

Preheat the oven to 375̊F. Cream shortening and sugar, then stir in molasses. Stir the dry ingredients together; blend into the dough alternately with cold water. Drop teaspoonfuls of dough 2 to 3 inches apart on a lightly greased baking sheet. Bake 8-10 minutes. Makes about 4 dozen cookies.

Spiced Molasses Jumbles
Make Molasses Jumbles except blend ½ tsp each of cloves, nutmeg, ginger, and cinnamon in with dry ingredients.

Lemon Molasses Jumbles
Make Molasses Jumbles, except stir in grated rind of one lemon (about 1 Tbsp) with the molasses.

Frosted Molasses Jumbles
Bake Molasses Jumbles. Spread with Butter Icing while still warm.

Butter Icing
2 ½ Tbsp soft butter
1 ½ cups sifted confectioners’ sugar
1 ½ Tbsp cream
¾ tsp vanilla
Blend sugar and butter together; then stir in the cream and vanilla until the icing is smooth.
------------------------------------------------------------------------

What do you know about molasses? Prior to making these cookies, I knew very little… So I had no idea what to say when Ryan stopped on his way home from work to pick up molasses for me and called to ask which kind I wanted. Betty made no indication in this recipe that a certain type of molasses should be used, so I went for Full Flavor- sounds like it would make a tasty cookie, right?

According to the Brer Rabbit Molasses website, the difference between the types of molasses is due to the number of times sugar cane juice is boiled to extract sugar. Mild molasses has been boiled once; it is lighter in color and sweeter because less sugar has been extracted. Full Flavor has been boiled twice, making it a little darker and less sweet. Blackstrap molasses has been boiled three times, making it significantly darker than Mild molasses and giving it a strong bitter flavor.


And did you know that brown sugar is really just regular sugar with a little molasses mixed into it? I learned a lot making these cookies. =D

So there you have it! Full Flavor worked quite well in these cookies, and as the middle-of-the-road molasses, I will probably use that kind again when a recipe calls for molasses.

For this recipe, I made standard, Spiced, Frosted, and Frosted Spiced Molasses Jumbles (basically, I just didn’t try the lemon variation). The book warns "Don't be alarmed at amount of baking soda; it makes the cooky more tender"... so don't worry about there being a whole tablespoon in there. I baked these for 10 minutes on an ungreased cookie sheet, and they seemed just right. The cookies were quite cakey and not too sweet, but also not bland because of the molasses flavor. I preferred the Spiced Molasses Jumbles and thought the cookies were actually better without the frosting.  Perhaps molasses just isn’t everyone’s favorite flavor, or maybe it’s because they didn’t look pretty enough, but I ended up eating most of these myself. My waistline hopes the next recipe is more popular!
Frosted or unfrosted, they made a great treat on my break at work!

Get ready for Jubilee Jumbles!
Carly

This cooky recipe and picture were found on page 10 of Betty Crocker's Cooky Book; the icing recipe can be found on page 150.

Wednesday, May 25, 2011

Old Fashioned Oatmeal Cookies


Betty promises these cookies will be “soft and moist on the inside and crisp on the outside.” I feel a lot is at stake because my husband states that oatmeal raisin cookies are near and dear to his heart. Will he be impressed with this recipe, or will it fall short of expectations?
------------------------------------------------------------------------
Old Fashioned Oatmeal Cookies
1 cup raisins
1 cup water
¾ cup shortening
1 ½ cups sugar
2 eggs
1 tsp vanilla
2 ½ cups flour
½ tsp baking powder
1 tsp soda
1 tsp salt
1 tsp cinnamon
½ tsp cloves
2 cups rolled oats
½ cup chopped nuts

Simmer the raisins in 1 cup of water until the raisins are plump, 20 to 30 minutes. Drain the raisin liquid into a measuring cup and add enough water to total ½ cup.
Preheat the oven to 400̊F. Mix shortening, sugar, eggs, and vanilla; add the raisin liquid. Stir together flour, baking powder, soda, salt, and spices, and blend into the dough. Stir in the oats, nuts, and raisins. Drop rounded teaspoonfuls of dough two inches apart on an ungreased baking sheet. Bake for 8 to 10 minutes, until lightly browned. Makes 6 to 7 dozen cookies.
------------------------------------------------------------------------
The first part of the directions instructs you to simmer the raisins until plump. I found this kind of strange (having never done this for any other cookie recipe that calls for raisins), but I figured it wouldn’t hurt since I had bought the store brand of raisins, and they were pitifully dry. Simmering them definitely plumped them up! When I went to drain the liquid from the raisins, I didn’t even get out half of a teaspoon; this may have only been because of the really dry raisins I used, but if you don’t actually see any excess liquid in the raisins when you are done simmering, don’t bother trying to drain them. Just add a half cup of water to the dough.
A blurry view of simmering raisins.
 I baked each pan of cookies for 8 minutes… or some even less time. What can I say, I like a soft cookie! The final result was soft and chewy cookies which sadly did not all hold together very well after a couple of days (perhaps I should have baked them longer…). They were also not crispy on the outside (perhaps I should have baked them longer…).  And I thought they could use more oats, because I could hardly tell they were in there (not related to bake time! Yay!). As usual, I could take them with or without nuts.

They were generally a crowd pleaser, and all of them were eaten within a few days of baking (unlike some cookies I’ve made- remember the jeweled cookies?). I thought they were scrumptious and probably ate more than my fair share of these. What did Ryan have to say? They were good, but not the best oatmeal raisin cookies he’s ever had- and they could use more raisins.

I was recently loaned a glass cookie jar (yeah, I don’t actually have my own cookie jar. What’s up with that?) and intended to photograph the oatmeal raisin cookies inside the cookie jar so you could compare it to Betty’s photo:
Betty's cooky jar is pretty full!
 However, one recipe didn’t even fill up my cookie jar half way and the cookies looked too sad in there, so you’ll have to settle for a standard cookies-on-a-plate picture.
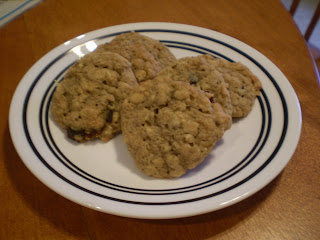
Chewy and delicious! Surprised they lasted long enough for me to take this picture. :)

Molasses Jumbles are up next! Get excited!
Carly
This recipe was found on page 9 of Betty Crocker's Cooky Book; the picture was found on page 87.

Monday, May 23, 2011

Pineapple Cookies

You probably thought (or hoped) this Cooky Blog was gone for good after two whole months went by without a post.  Things got a little busy for a while and cookie-baking ceased… until now! The people (really just Ryan) requested more cookies! But before another batch hits the oven, I have a couple of recipes to mention from way back in March that never made it up on the site- the first of which is for these delightful Pineapple Cookies. 
 ------------------------------------------------------------------------
Pineapple Cookies
1 cup shortening
1 ½ cups sugar
1 egg
1 can (8 ¾ oz) crushed pineapple, with juice
3 ½ cups flour
1 tsp soda
½ tsp salt
¼ tsp nutmeg
½ cup chopped nuts

Mix shortening, sugar, and egg; stir in the pineapple. Stir together the dry ingredients and incorporate into the dough. Mix in the nuts. Chill at least one hour. Preheat the oven to 400̊F. Drop rounded teaspoonfuls of dough 2 inches apart on a lightly greased baking sheet. Bake 8 to 10 minutes or until no imprint remains when lightly touched. Makes about 5 dozen cookies.

Pineapple Coconut Cookies
Make Pineapple Cookies, but omit nutmeg and add 1 cup flaked coconut.


Pineapple Raisin Cookies
Add 1 cup of raisins to the standard Pineapple Cookies recipe.

------------------------------------------------------------------------
So, the story behind these cookies is that once upon a time (probably about 12 years ago), I wanted to use up some coconut that had been hanging around in the cupboard for ages. For some reason, I picked this recipe even though it only calls for one cup of coconut… not really very helpful in using up coconut. Hmmm. (Insert Amy laughing at me right here.) Anyway, I ended up using two cups of coconut because, when adding ingredients, I dumped in the entirety of a 20 oz. can of crushed pineapple, accidentally necessitating a doubling of the recipe. (Insert Amy laughing at me again.)  I tend to make just one batch when trying out a recipe for the first time- and it would be very sad indeed to end up with 10 dozen of a gross kind of cookie. But don’t worry, these are awesome!  
I got wise and used slightly less than half of the 20 oz. can this time!
The first time I made these cookies, I only tried the Pineapple Coconut variety- but this time, I tried them all! This included Pineapple Cookies with nuts, Pineapple Cookies without nuts, Pineapple Raisin Cookies with nuts, Pineapple Raisin Cookies without nuts, Pineapple Coconut Cookies with nuts, and Pineapple Coconut Cookies without nuts. As with many other recipes, I couldn’t really tell the nuts were there, so in the future, I might just leave them out to avoid the confusion that comes from trying to keep six varieties of the same basic cookie separated.

I might consider re-naming these Pineapple Cookies to Pineapple Cake-ies; they are so moist and doughy, they remind me more of tiny cakes than cookies.  My favorites were the Pineapple Coconut Cookies, followed by the Pineapple Raisin ones. The standard Pineapple Cookies weren’t bad; they were just missing the YUM factor that the coconut adds.
Standard, Raisin, and Coconut Pineapple Cookies in the early spring sunshine.

Another tip for these cookies: eat them quickly. The longer you keep them around, the soggier they get! It’s easier to eat them fast enough if you make just one recipe. :)

Carly

This cookie recipe was found on page 9 of Betty Crocker's Cooky Book.

Thursday, March 17, 2011

Shamrock Cookies

Betty says that these Shamrock Cookies are “a grand St. Patrick’s Day surprise for the whole family. Faith and begorra, they’re good!” Will they be the tasty treat she promises? Read on to find out!

------------------------------------------------------------------------
Shamrock Cookies
1 cup shortening (half butter or margarine)
1 cup sifted confectioners’ sugar
1 egg
1 to 2 tsp peppermint flavoring
2 ½ cups flour
1 tsp salt
1 ½ tsp green food coloring

Preheat the oven to 375̊F. Mix the shortening, butter, sugar, egg and peppermint flavoring. Stir in the flour, salt, and food coloring. To shape shamrocks, roll three small (1/4 tsp) balls of dough and a small stem. Flatten them together and shape into a shamrock shape.  Sprinkle with green sprinkles. Note: complete cookies one at a time or the tiny balls of dough may dry out and crack when you try to shape them. Bake about 9 minutes. Makes about 9 dozen cookies.

Good Luck Cookies
Make Shamrock Cookies as above, but make 4 small balls for each cookie to shape into a four-leaf clover.
------------------------------------------------------------------------

Really, the first thing I had to do was look up the word “begorra.” In case you were wondering:

begorra- an interjection, used as a euphemism for ‘by God’

Okay! On to the cookies.

My first hang-up came as I was mixing up the ingredients and got to adding the mint flavoring. The flavoring itself smelled good (although strong), but once it was incorporated into the dough, the smell was kind of sickening… just a weird sort of minty bad smell.

Then, I got to the part when the dry ingredients are added. The only dry things are flour and salt, but it still seemed wrong to me to not to mix them together before adding them. Still, I decided to follow the directions and mixed in all of the flour followed by the salt, which I mixed for a long time to be sure that everything was evenly distributed.

Next, the food coloring. I first removed a small portion of the dough so that some cookies would be artificial coloring-free for Ryan. I think I used about half of my little squeezy bottle of green dying the rest of the dough!

The forming of the cookies was extremely time-consuming. Please see the following photo progression for that process.
A 1/4 teaspoon scoop for each ball.
3 balls + 1 stem= 1 shamrock! I also made a couple of four leaf clovers.
The pieces come together...
... and get squished!
A little poke in the side to get the right shape.
A little more flattening, and the shamrock is complete!
 Now imagine doing that for 9 dozen tiny cookies. Yikes!

When the first pan came out of the oven after baking for nine minutes, I found the cookies to be too dry. Also, my first one was super SALTY! YUCK! I knew I should have followed my gut and mixed the salt into the flour before adding it. Darn.
Sugary luck, fresh from the oven.
Pan Two was only baked for 8 minutes. The cookies still seemed a little dry, but they are just the type of cookie that is supposed to be more dry and crumbly than chewy, so I guess that’s okay.  The flavor was just weird, although I couldn’t quite put my finger on what was wrong with it. All I knew was that, even after a non-salty cookie, the aftertaste was not good.

At this point, I was upset about the gross-ness of the cookies and the fact that it was taking so long to form all of those little shamrocks, and- I threw the rest of the dough away.  A big ball of funny-smelling green, tossed in the trash. Good riddance!

I still gave these to a few people to try (they are pretty cute, after all), with a disclaimer that they were not good. According to some, they were “not the worst cookies” or even “good.” But most people agreed that they were kind of bitter with a weird after taste. They were even described as “like eating toothpaste”!
At least they look good...
If this is any indication, the only thing they ARE good for, apparently, is fodder for ravenous, rapidly-multiplying populations of Tribbles. 


So, if you want something good for St. Patrick’s Day, don’t make these. The recipe should say, “Faith and begorra, they’re gross!”

Pineapple cookies are up next! I know Amy is excited. :)
Carly
This cookie recipe was found on page 29 of Betty Crocker's Cooky Book. The cute, fuzzy Tribbles are from Jen. :D